
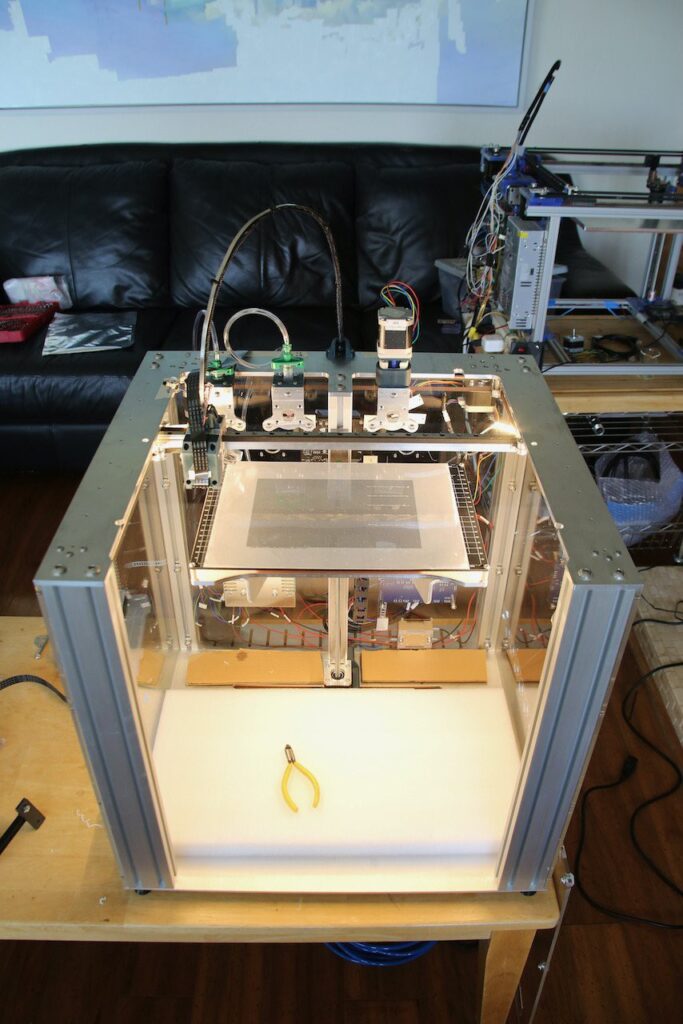
I have switched to designing for the E3D toolchanging motion system.
I had a two reasons for switching
- The the majority of the parts are metal, so it should have much higher precision and accuracy. The whole build quality is better. Because it uses more CNC machined aluminum and steel the cost is higher, but in the end I would rather pay more now just to get things working and cut costs later.
- I have a V1 Jubilee which has inconsistent tool changing. This has supposedly been updated with a remake, but I don’t want to build a whole new printer just to see. I opted to go with E3D’s solution, which is more repeatable and better tested from what I can see.
Mechanical design
So far I’ve tested four tools:
- Alignment Camera – Raspberry pi 2.0 camera. This is mounted on the toolchanger carriage
- Inspection camera: Raspberry pi HQ camera. 12megapixels and better (Kowa 12mm C-mount lens) glass make for a fantastic camera. Unfortunately this camera doesn’t fit on the E3D… Haven’t found a fix yet
- Pressure extruder
- Screw extruder
I mainly want to talk about extrusion and go into depth later about the extruder designs themselves. The easiest way to get extruding is to use a time-pressure extruder. Using a compressed air source, a solenoid, and a luer-lock with a 25-30 gauge tip, you can be printing in no time. The only downside is the need of an air source, in my case a rather loud compressor. The pressured needed is around 100psi at max for paste inks, and down to 12psi for low viscosity dielectric materials. The harder way to get extruding without all of that equipment is a screw drive extruder. This method uses a motor to push a plunger into a luer-lock syringe. The challenge with this approach is designing a lightweight and stiff extruder that can be disassembled for cleaning. The plunger inevitably gets coated in ink with this method, meaning it must be disposable or cleanable.
Software
I have been working on the software workflow for this printer for a while. The primary control system for the printer is a Duet 2 Ethernet controller with an expansion board to add more extruders and GPIOs. The Duet2 can be interfaced with a usb serial connection, so sending printer commands is as easy as sending text over usb with a python script. Example to home and move the system:
G28                 ;home the system, all axes
G0 X100 Y100 F1000  ;Absolute move to (100,100) at 1000mm/s
The strings of text are sent over serial. I initially started with some python scripts that allowed me to quickly play with test values for the speed, nozzle standoff height, and test various other print parameters. See example code here.
However, to put this out into the wider world requires a UI. I settled on using a Django website for the interface, after also considering an Electron app. However, I currently use a Raspberry Pi to control the printers, and Django was easier for development and meant only using one language. The current workflow is as follows:
1 Calibration step
- Home the motion axes
- Zero the very fragile extruder tips in the X, Y, and Z dimensions
- Save the camera offset distance
2 Design file selection
- Upload a printable file.
- Preview the print file to verify the paths
DXF files are easily parsable right now, so I’m using those for prints. To preview the file paths I plan to use a Three.js viewer. Covert the DXF vector information to paths, then give them a thickness. I can even model the build plate of the printer.
3 Print settings
I started by saving the print settings in a JSON file, and have moved to an SQLite server.
- Select the tool type to be used
- Select the recipe to use. The recipe is the specific settings for a print: print speed, ink specific settings, and tool specific settings. Example: Fast_Siraya_200umNozzle
4 Print
- Show the status of the print in terms of time left
5 Inspect (todo)
- Inspect and compare with design file
Todo later:
- Save images of the print
- Auto-calibrate the print tool by printing and measuring the printed lines