
Over the break I printed two identical cars for my younger brothers. I wanted a simple fun project for me, that they would enjoy. Both of them love toy cars, and love anything that is remote controlled. I decided on making a car for them after taking a quick look at thingiverse. The amount of printed RC vehicles on thingiverse is large: cars, planes, boats, it’s growing daily. The most mature and most suited to their age were the RC cars, which were also the most mature models.
I started with this model. It uses parts readily available off of amazon with the caveat that I replaced the RC battery with a pack of rechargeable AAs so I wouldn’t have to buy them a hobby charger. After finding the model, I looked around for a way to control it. I didn’t think I could find a cheap controller, so I figured an Arduino with BLE or Wifi would be best, as long as I could find a project that I could modify with minimal effort to control the car. I started looking into three things: a ready made UI web interface for joysticks, an IOT app like Blank that I had remember using before, and a browser app that broadcasts the tilt of the phone over bluetooth.
In the end I found a ready-made web page that is light enough to be saved on an ESP32 http server and will capture virtual joystick positions.
Build steps:
- Find a car design on thingiverse. Verify BOM cost
- Print the car designs in two colors.
- Buy hardware and assemble the cars – used only M3 screws and O-rings
- Install motors and speed controllers.
- Test with an ESP8266 and realize the USB-TTL serial cable you have is for the wrong voltage. Order one for 3.3V instead of 5V
- Realize the ESP8266 you have is dead and time is running out. Buy 3 ESP-32s
- Get the ESP-32s flashed with demo code to control the speed controller(servo signals)
- Try to setup the ESP32 as a webserver and realize you need an embedded filesystem (SPIFFS). Try to install spiffs, and fail. Realize the installer was putting the Java executable in the wrong location in the Arduino.app folder. Move the folder to a promising location and get it to finally work. Realize SPIFFS has been superseded by LITTLEFS. Kill an ESP-32 with a static shock and realize I now have no backups…
- Modify the joystick code to control the servo with the X axis as a test case. Celebrate when it works on the first try.
- Modify the joystick code to control the ESC and limit the max speed. Celebrate when it works on the third try.
- Solder the ESP-32s onto perfboard, connect the ESCs, and run a full test
- Write up documentation for how to re-flash the Arduino in order to use a different Wifi network.
I had originally planned to have the ESP32s run a wifi hotspot the phones could connect to, but ran out of time and just coded it to connect to my parent’s wifi. It limits the range, but better imperfect than unfinished and not working at all.
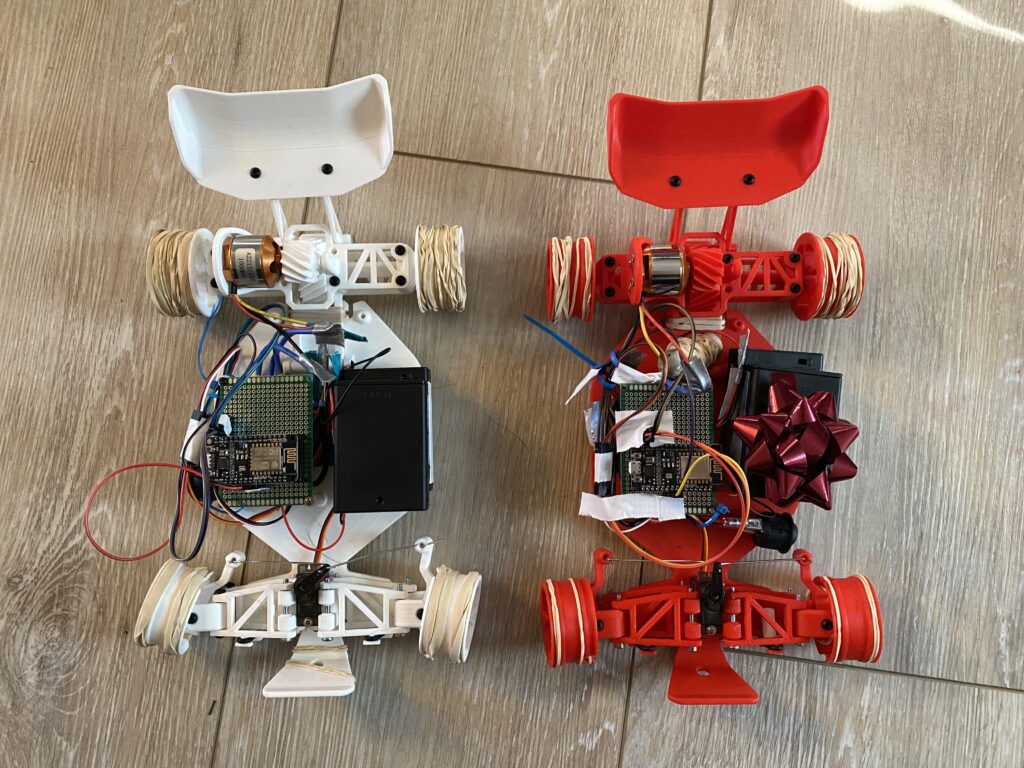
Here are the cars fully built:
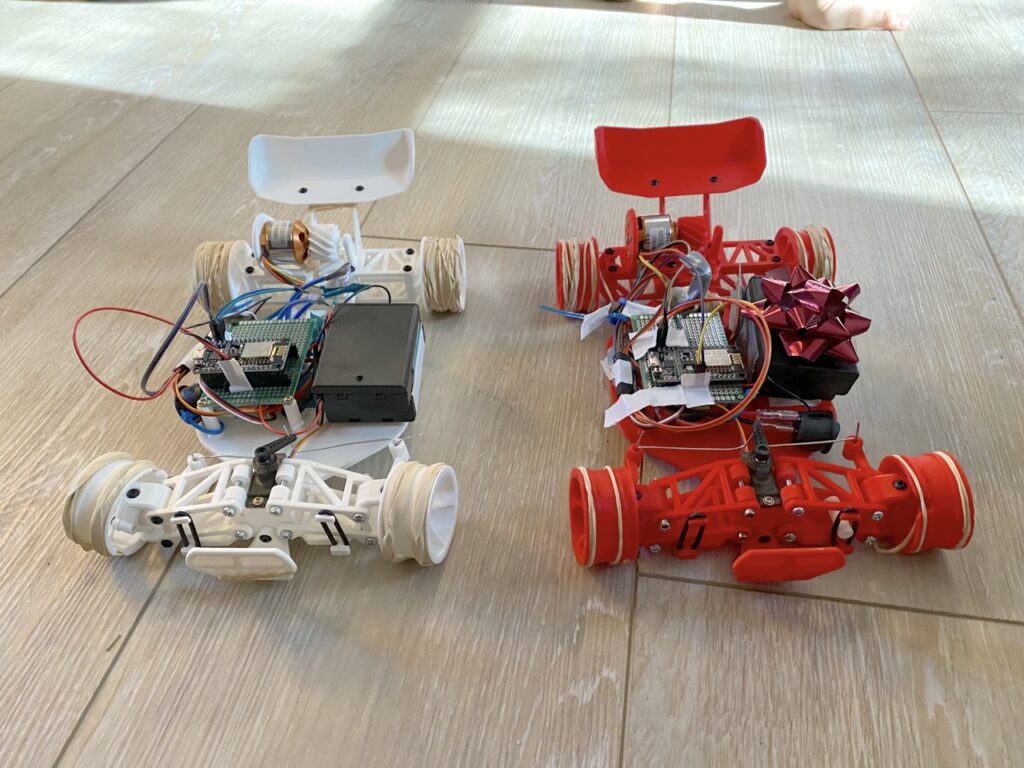
The finished creations. Bow and rubber bands added by my brothers
Resources:
Car design: https://www.thingiverse.com/thing:4233353
Joystick code I modified: https://automatedhome.party/2017/07/15/wifi-controlled-car-with-a-self-hosted-htmljs-joystick-using-a-wemos-d1-miniesp8266/